This article describes what an event is, how to track it and how to verify that it works.
When you enable analytics for a website it will automatically track all page views within the configured URLs. But if you want to know more about what your users do on your web you need to send additional data to Extellio as a custom event.
An event is basically built with four bricks, out of which only two are required:
Category (Required) - This describes the type of event you want to track, e.g Clicks, Element visibility or Videos.
Action (Required) - This defines the action that the user took. For example, with the Video category it could be stop, resume or fast-forward.
Name (Optional - but recommended) - This is usually the ID of the element that was interacted with. It could be the name of the button being clicked or the element that was visible.
Value (Optional) - This is a numeric value and is often added dynamically. It could be the cost of a product that is added to a cart, or the completion percentage of a video.
The specific values for each of these components are completely customizable. The only requirements are that every Event must contain a Category and an Action, and if you include a Value then it must be a number.
JavaScript tracking code
The most basic way to implement event tracking is by adding JavaScript directly to the page where the event occurs. There are many types of events and even more ways to catch them with JavaScript so we'll leave the implementation up to you, but to send the event to Extellio the following code should be used.
<script>
extellio_actions.push(['trackEvent', 'Contact', 'Email Link Click', 'name@example.com']);
</script>
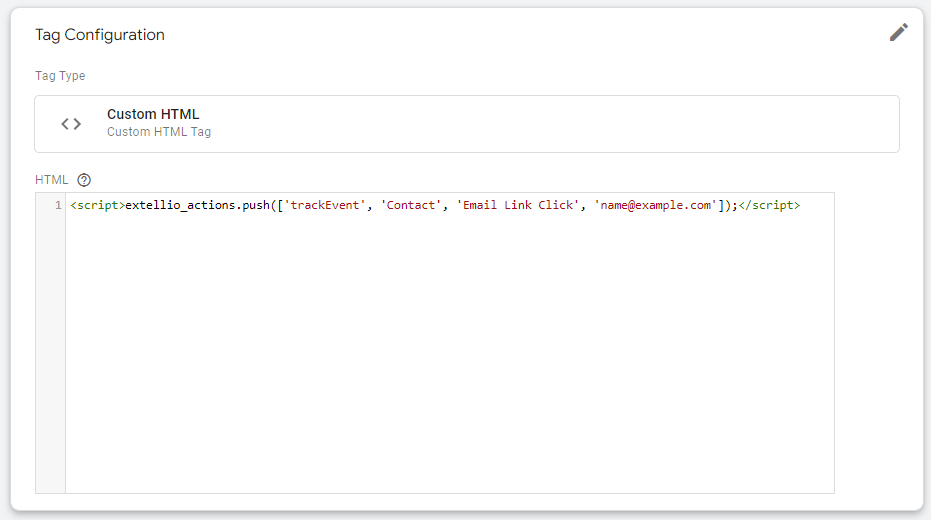
Tracking with a Tag Manager
If you use a Tag Manager on your website it's likely that you already have some events configured. Any event that is sent to your Tag Manager can be passed on to Extellio. This example shows Google Tag Manager but the process should be the same for all.
To track the event in Extellio, add a new “Custom HTML” tag and add the JavaScript for event tracking. Either hard code or use variables for the event values. Finally add the appropriate trigger to the tag.
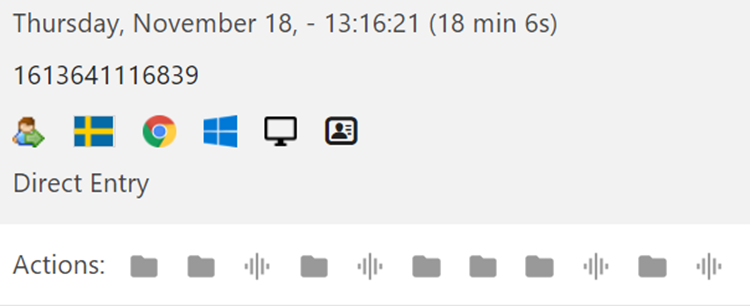
Verify that it works
To verify that your event has been received by Extellio you can go to your Extellio Dashboard and look in the “Visits in Real-time" Widget. Event shows up as different actions and looks like a striped square. You can hover the event or click the visitor profile to see the data that was submitted.